Thursday, November 19, 2015

Classic Lips

Where have I been?!  It seems like forever since my last post.  Sorry!  I've had a very busy schedule these last few weeks.

So I don't want to keep you waiting any longer.  Today I want to share with you the portion of my lipstick collection that I would call "classic."  To me, a classic lip is anything within the red family.  This includes pinks, corals, and oranges.  Classic colors like these are user friendly.  You just need to find the right tones to flatter your complexion.

Even red lipstick isn't just red lipstick.  Reds can have a variety of hues and undertones:  yellow, pink, blue, etc.  Which is why I have more than one red lipstick in my collection.  Sometimes I want a warmer red to set off golden eye shadow.  Or a cool red to stand out against a neutral eye look.  Whatever your need,  there is a red lipstick for every occasion. 

Classic lips are timeless.  They know no season.  Pink lips are just as pretty in spring time as they are in the dead of winter.  I think orange lips are perfect in the summer, but they are fitting to the colors of autumn as well.  And red...red goes with everything!

So here's some swatches to get us started.  These are what I would consider to be classic reds:


Riot and Nose For Style are definitely more muted reds.  Riot is described as "Marsala" which was Pantone's Color of the Year for 2015.  It's liquid to matte. Nose For Style is part of M.A.C's Haute Dogs collection and is limited edition.  It's a Mineralize Rich lipstick...so it has quite a bit of sheen and feels great on the lips.  Ruby Woo is probably my favorite red lipstick.  It's a matte lipstick, but it's much more comfortable than a liquid matte.  Mrs. Mia Wallace is from Urban Decay's Pulp Fiction collection.  This is a very comfortable lipstick, and it has a beautiful shine.  Redrum is a great red!  His formula is one of my favorites when it comes to liquid lipstick.  Hoe Hoe Hoe is part of the limited edition Holiday collection.  It's a bit darker and has purple sparkles! 

These shades are perfect for an every day look or an ultra glam look!


Here are some of my darker reds:


Tulle and Trust Issues have brown undertones.  On the lips, they look much redder.  Unicorn Blood and Wicked are both rich colors.  Unicorn Blood is a little brighter then Wicked, but both have a nice burgundy hue.  Dark Room is almost like a deep fuchsia.  It is compared to the color of beets, which I think is spot on.  Of all these colors, I find Tulle and Dark Room to be the most wearable.  I love deep reds like these for fall and winter.  However, I have been known to wear Dark Room on the hottest days of the summer!

Let's think pink, shall we?

I have been loving pink lipstick lately.  I find them extremely easy to wear!


Donut is just fun to wear!  It is a bit more coral, but it's more pink than orange.  Queen Supreme is a pastel neon.  This one works better with a liner underneath to darken the edges of your mouth a little.  Doll Parts is not only my favorite pink, but it might be favorite lipstick (at the moment any way).  And yes...that is quite a bold statement...but Doll Parts is seriously the perfect pink.  It's a little darker than most, not too "baby" and not too "hot."  It's just right.  Geradium is a close second (as far as pinks go).  It's warm and easy to wear.  Clueless is a limited edition shade based on the classic 90's chick flick.  It's a more nude pink.


Orange you glad it's time to talk about more lipstick colors?!


(714) is a pastel neon coral.  Against all these other oranges, it looks more pink than it really is.  I like this color, but of all my Jeffree Stars, it is my least favorite!  It looks much better with a liner underneath, but it is very pastel and against my fair skin it can wash me out a little.  Squash and Pumpkin couldn't be more fall if they tried.  I LOVE Squash so much.  Pumpkin is super wearable.  Gothica is a long-wear metallic.  I always forget about this guy.  Sparkly copper never fails.  Bang! Bang! is the perfect bright orange lipstick.  A Tennessee native, this color speaks to me on another level (Go Big Orange!).  It is definitely my favorite orange ever.

Obviously, I have a thing for classic lip colors.  They can seriously be worn by anyone.  Don't think that you can't pull off red lips...you can!  But if you're nervous to take the red plunge, ease your way in with a nice rosy pink.  Or try out a beautiful orange shade!  There is nothing stopping you from wearing your ideal classic lip color!

Pucker up, my pretties!

Friday, October 30, 2015

Halloween!

I probably should've posted this earlier in the week, but I'm always late to the party. Which is why these looks are great for anyone in a time crunch! It's no secret that I LOVE Halloween (who doesnt?) and at my place of employment, we are encouraged to dress up every weekend of October. Which is pretty cool. 

I also created these looks with things I already had. Both makeup and accessory wise. I have two big bins of full Halloween costumes and accessories. Another perk of my retail job. I realize not everyone has this advantage, but the looks I'll show require little in the way of extras. These are great for those of us with a tight Halloween budget! 

These looks are also work friendly. I worse normal (for me) clothing that complemented my makeup and accessories. 

For my first look, a simple bunny:


I threw on a black dress and cardigan I already had. A perfect start to a simple (lazy) costume. Also good for the workplace! I had the ears already, but they're easy to come by this time of year. And for less than $10. I did my makeup as usual, but drew on a little nose and whiskers. I used a black kohl liner to do this and set it with translucent powder to keep it from feathering or smudging. And on my lips I have "Bane" from Melt Cosmetics. Any black lipstick will do. Or black eyeliner to fill in the lips! Sometimes this lasts a little longer and works great in a pinch. Less than 5 minutes added to my normal routine. 

Next up, a fortune teller:


This look was even more basic than the bunny! I wore a regular black tank top I already had and threw on a fringe kimono. I already had the gold coin statement necklace, but I'm sure it wouldn't be hard to come by. Now, my turban is made by @roseandben. I have several of these bad boys and if I were ever to have a trademark, this would be it! This is a standard black bow turban with the bow removed. You could tie a scarf around your head for the same look! I went heavier than usual on my eye makeup. I used both the Lovesick and Dark Matter stacks from Melt. And I used the red shades on my cheeks for a flushed look. The moon was drawn on with MAC fluid line in "black track" and 210 brush. Very easy. Less than 5 minutes added to my normal routine. 

A really quick (comparatively) Day of the Dead/sugar skull look:


This took a little more than the previous, but it's nowhere near as detailed as some. I wore a black lace dress and the flowers in my hair I had already. I used white face powder all over yo start. I didn't have any white cream makeup and no time to buy any, but yes I had white face powder. I then used a gel liner pencil to draw large circles around my eyes. I used the same pencil to fill in the circles and draw the scallops around the edges. The same pencil was used in my nose and to draw the lines on either side of my mouth and the not so perfect spider web in my chin. Since I have bangs, I didn't draw anything on my forehead which was also a time saver. On my eyes and nose, I applied "dark matter" shadow from my Melt Dark Matter stack over the gel liner on my eyes and nose to set. I used my MAC 210 liner brush to apply the red dots around my eyes with Jeffree Star's liquid lipstick in "redrum." This is also the shade on my lips. And just a touch of "dark matter" as a sort of contour on my cheeks for a subtle hollowed appearance. For this look, I didn't do any of my normal routine. Altogether, it took me 30 minutes or less. 

I'll do one more look tomorrow, so it won't make it to this post. But here was my favorite:


A deer! I wore a plain brown sweater and jeans. Believe it or not, this was pretty easy to do. And only added about 10 minutes into my normal routine. I did my makeup like normal, but exaggerated my wings and added an open line on my lower lashes. I filled this in with my NYX jumbo eye pencil in "milk." For my eyeshadow, I used my Dark Matter stack shadows in "blurr" and "unseen." On my face, I applied "Havana" from my Anastasia Beverly Hills contour kit. I seriously never use this shade because it's a little too warm for me, but it was perfect for this look! I applied it heavily on my forehead and cheeks, all the way to my nose. And I used it along the sides of my nose as a contour as well. I used a black kohl liner to create my deer nose. My top lip is Melt "Bane" and the lower lip is Lime Crime "Shroom." I used the NYX jumbo eye pencil in "milk" for my spots and that's a wrap! I did buy the headband specifically for this look. There's lots of options out there. Easy felt ears can be made if you time and patience! 

These looks can be created with different makeup too. Don't go out and spend $50 on a palette if you don't think you'll use it regularly. Single shadows and bronzer scan be purchased at drugstores for a few bucks! If I didn't already have the palettes, that's where I would have headed. 

I can't wait to play around next year and make even better costumes!

Stay spooky, my pretties!

Monday, October 26, 2015

My Browcess: TUTORIAL

So I know everyone has seen a million brow tutorials on Pinterest or Instagram or YouTube. But I still get asked all the time how I do my brows. Which to me is a weird question because I don't think about the process anymore. I just do it! 


Like any other part of your makeup routine, this takes time. Trial and error. Lots of practice. Maybe a caterpillar phase. But don't worry. Those fuzzy, extra bold caterpillars will one day become beautiful browterflies. 

When it comes to makeup application, I'd like to think there are no rules, but rather guidelines to follow. Express yourself, but keep in mind the techniques of the trade. 

I'm sure everyone has seen a chart like this:

This is a super simple chart I grabbed from Pinterest. There are plenty more brow shapes and sizes out there, but this a good starting point. I always recommend to not over draw your brows. You should follow your natural line as much as possible. If your brows are over plucked or shaped incorrectly, it's alright to fill in the gaps! I also say to stop plucking/waxing for a while. See if you regain some fullness. 

My natural brows are shaped well, and they aren't super sparse. My hair is just light and a little fine. So my brow "goal" is to darken and define. Your brow goals might be different from mine. Your brows may naturally take a different shape from mine. I absolutely love the look of "flat" eyebrows, but it just isn't the appropriate shape for my face or my natural brow line.  

Luckily, I didn't pluck mine into pencil thin lines in my adolescent years: one great piece of advice from my mother, who in the 70s plucked her eyebrows into nearly nothing. And they never really grew back. But that was the style in her youth. She told me to be extra careful with my eyebrows because they might never grow back. 

I've never had my eyebrows professionally tamed. No waxing, threading, etc. I've always been afraid they might make them too thin. If you have a good brow professional in your life, you should kiss the very ground they walk on because eyebrows are probably the most important thing ever in the makeup world. It's true: they frame your face. So be careful with them!

Bold brows are the trend these days. And bold doesn't necessarily mean huge bulky lines on your forehead. As I mentioned earlier, follow your natural lines! Don't go too dark either. When purchasing brow products, look for a shade that works with your skin tone AND hair color. I see blondes who go with darker brows because they have darker skin, and fair skinned blondes choosing lighter brows. So I wouldn't just choose a color based on your hair. Or just on your skin! And what if you have rainbow hair? Do you dare rock blue brows to match your aqua locks? I'm not 100% into that look, but makeup is about expression so do what you want! If you don't want to color match your brows to your vibrant hair, I think a neutral brunette eyebrow is a good choice. 

Now that I've rambled about brow etiquette, let's talk tutorial! 

I'll start with my products: 


I use tweezers rarely to pluck stray hairs. These are those pesky little eyebrows that grow way below your natural line. 

Anastasia Beverly Hills dipbrow pomades are my favorite. I've tried powders and pencils, but these gel-like pomades are life. I use two shades: Taupe and Ash Brown to complement my silver hair and fair skin. 

I apply these pomades with the ABH #12 brush. The small angled brush allows for precise application, but is also useful for applying more product when needed to fill in larger areas. The spool end is essential for blending. A sacred step one should never skip. 

NYX wonder pencil is such a wonderful little product. It's a concealer pencil with many uses, but my primary use is brow cleanup! I use the "light" pencil to cover up any messes on my eyebrows after applying pomade or blending. This step accentuates the shape of the brow even more. I use two different brushes to smooth out the concealer. Both are from e.l.f. so they were super inexpensive. I use the professional concealer brush and the small angled brush. The angled brush is great for cleaning up around your arch. 

I finish with ABH clear brow gel! 

The following is a (terrible) pictorial of my brow process (aka browcess):


1. This is my natural brow, combed with the spool end of the #12 brush. 

2. I use the angled end of the #12 brush to apply dipbrow in Ash Brown to create a line on my lower brow. I follow my natural line. 

3. Same as step 2, I use the angled end of the #12 brush to apply dipbrow in Ash Brown to create a line on my upper brow. I follow my natural line. I allow the longer hairs in the front to reach above this line for a more natural look. 

4. I use the angled end of the #12 brush to fill in the lines I created in steps 2 & 3. For this step, I use dipbrow in Taupe. I don't fill in all the way to the front of the brow. When I blend in the next step, the gap will be filled in and an ombré look is achieved. 

5. To create extra definition, I go back in with dipbrow in Ash Brown using the angled end of the #12 brush. I start around my arch and go all the way to the "tail." This step is optional, but it creates a more dramatic ombré. Then, using the spool end of the #12 brush, I blend blend blend! This step is NOT optional! Blending gets rid of any harsh lines and creates a natural look. I blend from front to back. 

Not pictured is the concealing. I apply my NYX wonder pencil anywhere that I may have gone outside the lines. This happens when blending. I use the e.l.f. professional concealer brush to blend the concealer above my brow line in an upward motion, and to shape the front of my brow. I use the e.l.f. small angled brush to blend concealer below my brow line in a downward motion. This brush is perfect for cleaning up your arch as well. 

6. Top with clear brow gel to set your shape and done!

And that's how we get this: 


I am still learning and still perfecting my browcess. I've reached a point of consistency; my brows look the same every day. And that's a big step for me! Keep practicing. Try different products. Different brands. I tried several different things before landing on this regimin. I encourage you to do the same!

Thanks for "browsing" my pretties!
Tuesday, October 20, 2015

Don't Look At Me: REVIEW

So I'm sitting here trying out a new mask I picked up from Lush a few days ago. This guy is fresher than fresh. It's one of their Fresh Face Masks. I grabbed one of their new concoctions: Don't Look At Me. This one is packed with exfoliating rice and refreshing lemon juice.  How great does that sound? 


It's even better than it sounds. The lemon juice purifies your skin and the ground rice provides gentle exfoliation...somewhere between a salt and a sugar scrub. It's not as abrasive as salt and not as gentle as sugar. This would probably be a good mask to start with, which is why I picked it up. 

As I've mentioned in a previous post, I have combination to mildly oily skin.  I want my skin care treatments to purge my skin of any bad vibes and leave me with a brighter complexion over all. Don't Look  At Me does exactly that! 


This super fresh mask also contains citrus oil and rice milk so it won't leave your skin thirsty. 

I applied this mask straight from the fridge after I removed my makeup. That instant cooling sensation was super refreshing! I left it on for about 10 minutes (maybe a little longer) and rinsed with warm water.  My skin felt clean and smooth and looked radiant overall. I will definitely be purchasing this again. 


The down side to a mask so fresh is a short shelf life. My mask was made on 10/6/15 and needs to be used by 10/27/15. That's 3 weeks! The mask also needs to be kept refrigerated due to the fresh organic lemon juice and rice milk inside. For that reason, Fresh Face Masks are only available to purchase in Lush shops (Mask of Magnaminty can be purchased online). It's around $8 for a 2oz container...which I think is fair. There are probably at least 6 uses in each container, but I can't say for sure since I haven't finished the jar. 

I got my mask for free because I turned in 5 clean Lush pots! What a great incentive! Now that I know how awesome these masks are, I will definitely make a purchase next time I visit a shop.  And I save EVERY pot so I'm due for a freebie again soon!

If you find yourself near a Lush shop, do yourself a favor and pick up a mask!

Stay fresh my pretties!

Sunday, October 11, 2015

n00dz (and neutrals!)

I'm on my way to the beach right now, and in honor of the bare skin I'll be sporting, I think it's time we get down to it. After all that talk of a bold lip, why don't I share my nude collection?  And I don't mean risque photography...I'm talking about the big lip trend for this fall:  nudes!

There are SO many nude lipsticks out there.  Like...an overwhelming amount of them.  I'm guilty of buying up all the neutral lip shades I can get my hands on.  Even though my husband thinks they "all look the same."  They don't.

I have more neutral and nude lipsticks than anything else in my collection.  The reason?  I love bold lips.  We've already discussed this.  But, bold lips aren't right for every occasion.  Neutral lips are sexy any day of the week and for any event.

Nudes to me are shades that are peachy, pinky, brownish, grayish colors.  I consider neutrals to be any sort of muted color that's...well...neutral.  Some of my neutrals are reddish, or purplish, or something like that.

I'm going to be swatching some of these shades multiple times so you can see how they compare to one another.

Let's start with the Nood Collection from Melt:


I obsessed over this collection for MONTHS.  Of course I got them all.  N00d is by far my favorite of the collection, and maybe my favorite nude in general.  Sext is a little light for me.  I'm super fair, so this shade kind of blends in with my skin.  If I wear it with a liner, it's much better.  Laced is a good one to wear any day of the week.  Catsuit is a little more vampy, so I usually wear it if I'm going out for the evening.  And it's perfect for fall!  All of these shades are matte, but the formula is slightly creamier than Melt's usual.

Now for Lime Crime:


Babette, Coquette, Cashmere, Bleached, and Faded I would consider to be nudes.  Faded is almost a perfect match to my natural lip color.  The rest are what I would call neutrals.  They aren't really nudes, but they aren't super bright or saturated.  But I love them!  Babette and Coquette are matte lipsticks, and the rest are liquids. 

Here's some from Colourpop:


I wrote about Colourpop a few weeks ago, so check out my post to get a full review!  Brink and Grunge are matte Lippie Stix and the rest are liquids.

Here's some randoms:


The Jeffree Star shades are liquids.  Too Faced Melted lipsticks are creamy liquid lipsticks with long wear.  Creme d'Nude is a cremesheen lipstick.  Stone and Lolita are matte.


And here's a comparison of some possible dupes!  As you can see, none of these shades are exact matches, but some are pretty close!


Nude lips are my Holy Grail.  I obviously can't get enough.    With so many finishes and formulas, it's hard not to want them all.

Now I'm going to put my toes in the sand!


Life's a beach my pretties!

Saturday, October 10, 2015

Hair Trend: Silver Fox

It seems like everyone is going gray these days...including me.  I have never been interested in "hair trends" in  my entire life.  But I started seeing so many beautiful young ladies rockin' granny hair.  I was filled with a jealous rage.  Why couldn't I be brave enough to do that?  Before I took the leap, I did quite a bit of research.  Several of my friends are hair stylists, so I had a little expert advice to help with my decision.  I also have a friend with faux silver hair, so I asked her about her hair care routine so I would be prepared to make any changes.

I'd never had my hair a "crazy" color.  It was scary.  How silly does that sound?  I was horrified to do this to my hair.  So why do it?  Well...YOLO.
 

I have been coloring my hair (in salons and at home) for YEARS.  Like ten plus years.  Literally since I was in high school.  And the last eight years, I've spent my time as a redhead.  So here I am...with eight years worth of red dye penetrating my hair and I want to go silver.

Awesome.

Not only was I worried about the process itself, I was worried about how I would look.  I have a pretty neutral skin tone, but I'm super fair.  So I thought I'd either look like a corpse or some kind of mermaid witch.

Even though I'd been coloring my own for years, I couldn't fathom doing this myself.  I'd never bleached my hair and I was terrified.  All my salon babes had been raving about this salon exclusive product, Olaplex.  Basically this is some sort of voodoo miracle product.  When you bleach/color your hair, the risk of damage/breakage is present.  Olaplex drastically reduces this risk.  I'm not a professional, so I don't really understand that magic that is Olaplex.  What I do know is this product makes it possible to really push your hair to the limit while maintaining health and integrity.  So even over processed hair can undergo change with little risk of severe damage.

For good reason, Olaplex is only available to licensed hair care professionals working in a salon.  This is something you can't try at home even if you wanted to.

I was already scared about this huge change I was making, so no way would I try to do it myself.  I knew that I wanted Olaplex used during this process, so I knew I was going to have to seek professional help.  Even though I'd colored my own hair dozens of times, this wasn't something I was willing to risk.  I love my hair and I didn't want to hurt it too badly.  Plus, I knew with all those years of red dye, it would be a difficult transition.

I selected a stylist in town based on recommendations...and I stalked her Instagram and checked out her salon's website before I made a full commitment.  Sam didn't disappoint!

She was definitely the right decision.  She made sure I was comfortable with the entire process and explained each step to me so I was completely aware of what was happening.  Thanks to her, I was able to transition from red to gray!
Photos by Sarah Nix

We started with a color remover, bleached twice with Olaplex, toned and applied Pravana silver.

It was literally an all day thing...over six hours in total.  BUT we did it all in one day.  You could totally break it up into two sessions, but I wasn't willing to walk around as a blonde for any period of time.

Now that I have this hair, there are some specific maintenance requirements.  But even with those, I am still in so much LOVE with my hair!  I am so glad I made this change.  It was completely worth it.

The maintenance involved with silver hair is a little different from other color maintenance.  Here's what I do:

I only wash my hair once or twice a week (you should try it...it's awesome) but when I do,  I wash and rinse in cold water.  Which sucks, but it's so much better for color treated hair.  I also use a purple shampoo.  I really like Daddy-O from Lush.  Purple shampoos keep blonde and gray hair from getting brassy, or yellowing.  I also use Lush's Rehab particularly on my ends to keep my hair from getting dry.  I finish with Lush's American Cream conditioner.

My stylist also gave me a tube of the color we used (Pravana Silver) to mix with my conditioner at home.  Which I do every time I wash my hair.  It's not going to wreck your hair either, because you're only leaving it on for a few minutes.  It's just a good way to keep your color looking good between visits.  Any type of pastel or jewel toned colors are going to fade a little quicker than more natural colors, so adding some color to your conditioner really helps maintain your color!

I also purchased Olaplex 3 from my stylist which is kind of like a hair mask.  I use this every 3-4 shampoos.  You put it on your hair at least 20 minutes before you plan to wash it.  My stylist even recommended to put it on the night before and sleep with it in your hair for maximum treatment.  This "hair perfector" is something you can use on an "as needed" basis.  My hair isn't that dry, even after bleaching, so I don't feel like I have to use it that often.

It took me no time at all to adjust to my granny hair, something I worried about.  I get so many compliments on my hair so I feel confident that it was a good change to make.  The only makeup change I made was switching up my brow colors!  I use Anastasia Beverly Hills Dipbrow.  The change was simple:  Auburn to Taupe.  I feel like my hair sets my eyes off and makes my lipstick appear more vibrant!


The main thing I can not stress enough...SEEK PROFESSIONAL HELP!

I've watched several tutorials on making this transition at home, but I can honestly say that it's nowhere near as safe as doing it in a salon.  Especially when the transition is drastic.  I don't regret a penny of the money I spent making sure this was done the right way.  I encourage you to do the same!


Change is good, my pretties!

Thursday, October 8, 2015

Social Media + Makeup

Instagram seems to be the place to find the most amazing makeup artists.  I can't lie, it's where I find out about new products and brands.  It's also where I find new MUAs to drool over and draw inspiration from.  So, I'm going to share with you my favorite makeup related Instagram accounts.  If you love makeup as much as I do, you need to be following these accounts.  Period.

My first lovely lady to obsess over is Rose (@roseandben)


Not only is she absolutely gorgeous, she is a woman of many talents.  Makeup isn't her only outlet.  She and her husband are a music duo, Rose and Ben.  Her voice is simply beautiful.  And as if makeup and music aren't enough, she also designs adorable turbans. 


Several of her turbans are in my possession, the perfect answer to unwashed hair.  I wear my turbans constantly.  She's also one of the sweetest people I've ever had the pleasure to stalk on the internet. 


 She replies to comments on her photos as best she can and even finds the time to Snapchat with us!  She's such a positive person.  Am I starting to sound creepy?


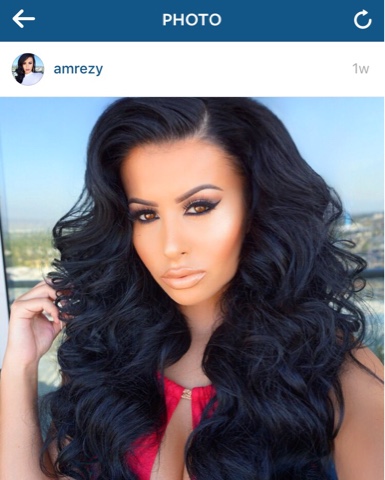
The goddess, Amra Olevic (aka AMREZY) is another one of my favorite accounts (@Amrezy)


Ok, so I don't know a lot about Amrezy.  She went to makeup school, and is an actual makeup artist.  With Anastasia Beverly Hills, she released an amazing eye shadow palette.  


As far as day to day work, I couldn't tell you what she does.  She just exists and is magnificent.


I follow her on Snapchat as well, and I can tell you that I live for her Rant Mondays.  Basically this is her, talking smack about haters.  She's a badass and doesn't care who knows it.  


Samantha Ravndahl is another one of my top choices (@ssssamanthaa)


This girl was one of my top inspirations for going gray (post about that coming SOON!).  I showed my stylist pictures from this account.


What I like about her is her adorable personality.  Her Youtube tutorials are what I imagine mine would be like...full of ridiculous and funny commentary. 


We can't forget about @missjazminad


She has some of the most perfect lips on the internet.  I've never tried any sort of lip art, but if I was going to I would definitely seek inspiration from this lady. 


 Her lips are so awesome that she's a lip model for Jeffree Star and Anastasia Beverly Hills (and maybe some others that I'm not aware of).  She's a beautiful person, inside and out.  I think what draws me to her most of all is her struggle with weight loss.  She's managed to drop 121 pounds total.  


Not only does her beauty inspire me, but her weight loss journey motivates me to get back on track with my own weight loss.


Now my final accounts are not really makeup artist accounts, but hands down the two accounts I look to more than any others!

@thelipswatch 


This account is run by the anonymous K & L, two makeup enthusiasts who never show us their faces!!!  I'm dying to know what these girls look like.  We're only given photos of their lips!


  On this account, they share exactly what the name implies:  swatches of lipsticks.  And some lip art too.


These girls also run another account, @dupethat


This account, also self explanatory, is where K & L share dupes (duplicates) of different makeup brands.  They share every dupe imaginable, from lipsticks and eye shadows to foundations, even brushes.  


Finding dupes is about more than just seeing what cheaper alternatives are out there.  Dupethat will show you comparisons of shades to help you determine which ones are best for you.  One of their latest shows a comparison of different brown lipsticks.  


This is helpful if you already own one or more of these shades, you can decide if the others are different enough to justify purchasing!  They also share a "weekly favorites" post on Fridays, which I love. 


Their site, dupethat.com is a wealth of information itself.  Here you will find tons of product reviews...in deep detail.  They also include easy to reference comparisons like they share on Instagram.  It might be a bold statment, but this is my favorite Instagram account.


This is a short list, I know.  But these are my top 5 accounts!  I don't think any of them post anything I don't double tap.


Now go follow them, pretties!

Wednesday, October 7, 2015

Bold lips? YES YOU CAN!!!

When it comes to lipstick, I fear no shade.  I will wear any color any time.  And I really mean any color.  The only thing that bothers me about my bold lip choices is hearing people say “Wow!  I love your lip color!  I could never pull it off though.”  Ummmmm what?  Of course you can!

When I first started falling in love with lipstick, I had the same thoughts.  But then I remembered that makeup is supposed to be fun.  I’m sure some people see me with turquoise lips and think I look ridiculous, but I think I look fabulous!  And that’s all that matters.

I think everyone should feel confident enough to rock a bold lip color.  Step out of your comfort zone!  I promise you won’t regret it!  Most companies have social media accounts, Instagram included.  I research lipsticks on Instagram more than anywhere else.  I primarily search using #hashtags.  This way I can see shades on different skin tones, and find one close to my own so I get a decent idea of how I might look with certain lip colors.  This is a good way to find normal photos and see how the lipsticks look in natural light, with no retouching. 

Now I’m going to show off some of my collection.  I always use a lip scrub and apply a thick layer of lip balm before applying any lipstick. 


Before we talk swatches, here’s a mini-review of each brand/formula:

Lime Crime Velvetines:  these are liquid to matte.  They are the fastest drying of all the liquid brands I have tried.  I personally find the formula to be consistent between shades, although I’ve read other reviews that suggest otherwise.  These dry my lips out more than some other brands, but I still love them!  They smell like cake!

Lime Crime Unicorn Lipstick:  these have a semi-matte finish.  I say semi-matte because some shades have slight sheen.  They are long wearing and have a sweet vanilla scent.

Kat Von D Studded Kiss Lipstick:  these are matte or metallic.  The mattes are very drying, so make sure to wear LOTS of lip balm underneath!  The metallics don’t dry your lips out, but they are just as long wearing.  They smell like creme brulee!

Melt Cosmetics:  one of my favorite brands, these are all matte shades.  Some of the shades are a little difficult to apply unless you warm them up a bit (I suggest rolling the tube between your hands for a few seconds before applying.  Blow, Blitzed, and the Nood Collection have a slightly creamier texture.  They smell like vanilla cake.

MAC:  their lipsticks are available in several finishes.  The one I swatch here is matte.  The least drying of any matte I’ve ever tried, MAC’s matte lipsticks offer long wear.  All of their lipsticks and glosses are vanilla bean scented.

Jeffree Star Cosmetics:  this liquid to matte formula is probably my favorite...even though I find the formula to be slightly inconsistent between shades.  The pastel colors don’t apply as evenly as the darker shades, but I just apply a second layer before it dries completely.  These are more comfortable to wear than some others.  They have no scent. 

Anastasia Beverly Hills:  also liquid to matte, this formula is comparable to JSC as far as comfort goes.  They don’t dry my lips out like some other formulas.  They also have no scent.


Following are swatches of what I would consider my BOLD lipsticks.  The photos on the left are without flash, photos on the right are with.

Let’s start with purples!  Purple was my first step into the world of bold lip colors.  I think purples are really easy to wear.  However, certain shades can make teeth look a bit yellow.  The purples I have do NOT make my teeth look yellow at all, but there are others that may.  A few of these look sort of pink-ish in these photos, but on the lips they lose that pink hue. 


Blow Pony, Rave, Pansy, Jinx, and Potion are liquids. The rest are matte lipsticks.


Onto the blues!  Blue is a little scarier than purple, but I think it’s another good place to start.  Blue shades seem to flatter every skin tone.


Blue Velvet and Abused are liquids. Blitzed is matte. Cry Baby has a slight iridescent sheen. Poe is metallic.


And a little green never hurt anyone!


Mint to Be, Blitzed, and Blow are matte. I swatched Blitzed again to show you how it compares to greens! Dirty Money is liquid. 


Now for the monochromatic shades:


Space Cake and Bane are matte. NaYEON is metallic. I don't have a black liquid, but don't worry. One will wander in to my collection eventually!


I encourage you to grab a bold lipstick ASAP.  I usually do a more neutral eye look when I wear bold lips, but there’s nothing wrong with going all out!  Gold glitter looks amazing when paired with purple lips.  And nothing sets off those blue lipsticks like a bright orange eye shadow.  Don’t be afraid to try something new!


I know you can pull it off, my pretties!

Tuesday, September 22, 2015

My Skin Care Routine

Skin care is super tricky.  Not only does everyone's skin behave differently, but your skin also changes throughout your life.  Which is what makes it so difficult to pin point your skin care needs.  And the fact that there are hundreds, thousands of products out there doesn't make it any easier.

The advice I'm about to give is simply my personal trial and error.  I'm not a skin care professional!  And understand that we're all different.  What works for me may not work for you.

When I was in high school, I did not take care of my skin.  At all.  I slept in my makeup...every night.  The best part--my skin was flawless.  I was blessed with a near perfect complexion.  Rarely any breakouts and a bright, even skin tone.  Then I turned 20.  Yeah, so old.  But that's when I started to realize my skin was changing.  For the first time in my life, I was faced with major skin concerns.  I constantly experienced breakouts and my skin was no longer as radiant as it used to be.  My first mistake was misdiagnosing my own skin care needs.

I thought I had adult acne, so I started using various acne products.  I didn't realize I was only making matters worse.  I tried every brand imaginable.  I even tried homemade remedies like honey or lemon, even coconut oil.  I saw zero results.

The answer was in front of me the whole time.  Lush quickly became my Holy Grail.  I had familiarized myself with Lush when I first saw a girl post an Instagram picture of a tub full of pink bathwater.  My discovery of the bath bomb was life changing.  Lush is much more than luxurious fizzy bath time fun, so I made up my mind to splurge on my skin care and take a leap of faith.  The closest Lush shop is two hours from me, but I knew I would be in town so I made a point to visit a shop for the first time.  I'd researched their products online and kind of knew what I wanted to try, but the Lush employee was able to point me in the right direction.


I thought for sure I needed to use Herbalism to control my acne.  When I was perusing the cleansers in the shop, I was told that I didn't have acne.  Huh?  What I came to realize is that I have combination to oily skin.  I needed a cleanser that would absorb excess oil without drying my skin out--which is what all those acne fighting products were doing to me.  I was offered Dark Angels for my skin care woes.  This charcoal based scrub purifies your skin, clearing breakouts along the way.  Avocado oil leaves your skin lightly moisturized.  This cleanser was exactly what I needed.  Not only does it help prevent breakouts, but it brightens your skin tone as well.

I pair this with Lush's  9 to 5 (cleanser), Tea Tree Water (toner), Enchanted Eye Cream, and Imperialis (moisturizer) for a glowing complexion.  I am obsessed with Lush's products.  Especially my skincare set up.  My cleansers purify my skin and my toner refreshes.  I use eye cream to maintain moisture on my most delicate skin, and to combat dark circles and puffiness.  Moisturizers are important for overall smoothness and anti-aging.

  Part of caring for oily skin is being careful not to remove too much oil.  All skin needs a certain amount of oil.  Sometimes your body produces just enough (normal skin), too much (oily to acne prone skin), not enough (dry skin), or varying amounts (combination skin).  Your skin care products should work to balance your oil production.  With oily skin, removing too much of your natural oils can lead to bigger problems.  If your body finds that you've removed too much oil, it will work over time to produce more.  Which is why oily skin and acne are so difficult to treat.  Even people suffering from acne need to use some type of moisturizer to keep their natural oil production at bay.  It's all about tricking your skin (muahahahahaha) into thinking everything is fine.

No matter what treatment options you use, all skin types need to be treated gently.  Always be careful with your skin!  Don't pick at it, don't even touch it.  This is a terrible habit to break...believe me.  But I've finally reached a point where I only touch my face if I'm cleaning it or applying makeup.  Throughout the day I keep my hands off!!!  This is good practice not just for healthy skin, but for a healthy body.  Speaking of a healthy body, drinking plenty of water isn't just good for your insides.  Keeping your body hydrated will also keep your skin hydrated!  Hydrated=healthy

Here's a break down of my routine:

AM:  Use Dark Angels cleanser on face and neck.  Rinse THOROUGHLY.  Pat face gently with towel.  Lightly spray Tea Tree Water over entire face and neck.  Enchanted Eye Cream gently tapped over entire eye area with ring finger.  Apply Imperialis over entire face and neck.  Then I apply makeup!

PM:  Remove eye makeup with liquid eye makeup remover (any brand will do!) and cotton pads.  Wipe off makeup with makeup removing cloths (I do this so when I use my cleanser, there is less work to be done).  Use 9 to 5 cleanser (this reminds me of cold cream) with Clarisonic Mia 2 to fully remove makeup and cleanse.  Rinse.  Pat face gently with towel.  Lightly spray Tea Tree Water over entire face and neck.  Enchanted Eye Cream gently tapped over entire eye area with ring finger.  Apply Imperialis over entire face and neck.
 

I'll admit...sometimes the PM routine doesn't happen.  We all have those long nights and we get in late and we don't feel like washing away the evening.  When that happens, I always ALWAYS ALWAYS at least use a makeup wipe.  I even keep a pack in my bedside table so I have zero excuse to sleep with my makeup on.  These things don't remove all of your makeup, but it's better than nothing.  I can't stress enough the importance of removing your makeup before bed.  No matter how "tired" you are.  Get that stuff off ya face!  And tomorrow you can treat yourself to a mask or something (I recommend Mask of Magnaminty).

I like to use a mask at least once a week.  If you live close to a Lush shop, check out their Fresh Face masks.  I don't get to use these because they are ONLY available in shops since they are made with super fresh ingredients and need to be refrigerated.

If you wear makeup regularly, it's also not a bad idea to give your skin a break for a day or two.  I usually give myself one cosmetic free day on one of my days off.

I love my skin now that I've found my routine.  It took me a really long time to land on something that works for me.  So don't give up hope!  If you find yourself struggling to get your skin under control, just be patient.  It's not going to happen overnight.  It took me years to find the products that work for me.  Maybe Lush has something that will work for you.  I wish I'd found them a LONG time ago.  To me, their products are worth every penny.


Remember, good skin is the start to good makeup!  Keep it fresh pretties!

Wednesday, September 16, 2015

Nailed It!

I'm a huge fan of stiletto nails. The pointier the better. I am NOT a huge fan of the expense, however. I was going to the nail salon every 2 (okay...3 because I'm a cheapskate) weeks for a fill in and that gets expensive. Especially when you're getting gel polish (+$10) or designs (+$5 or more) or whatever. It's not hard to rack up $40 or more on regular nail maintenance.

Well, then I had an accident. Everyone who has ever had acrylic nails knows about these accidents. Something breaks or cracks or rips and often it involves your real nail hiding beneath the surface. I won't go into too much detail, but something broke and there was blood. Acrylics had to go for a while, at least so my natural nail could heal a bit. 

My natural nails are super brittle and peel/break so it's basically impossible for me to achieve any decent length. And I was missing my claws!

Then I remembered seeing Nailhur on Instagram. Tons of MUAs use them so I thought I'd see what the fuss is about. 

Nailhur is host to a wide selection of pre-designed "nail makeup" for a decent price. They offer different shapes and tons of styles. Nail sets come with 24 nails in 12 sizes, nail glue, and a file. So they're just really press-on nails BUT they stay on extremely well! Their website says up to 2 weeks of wear, which may or not be real life. So far, I've had mine on for five days, and I work retail, and they show no signs of budging. They're also reusable, so you can remove them and use again!


I'm super impressed so far! There are a few negatives, but I'm sure there are ways to avoid them. I do find they scratch easily, especially when I filed them down. But I filed them after I put them on. So maybe if they're filed before application they won't get scuffed. Using a top coat might help avoid some daily wear and tear as well.  These do not wear quite like salon acrylics, but that's fine with me.  I'm all about the aesthetic.

But the price is well worth it. Their website lists sets at $39.99 BUT their Instagram always has coupon codes that drop them down to about $13.99 per set. Shipping is $5 or something and they arrive in about two days! 

These are great for people who can't commit to full on acrylic nails. They're easily removable and cause little (if any) damage to your natural nails.  And they are much cheaper!  Plus, you can customize them to suit your taste.  I just love these guys.


Stay fierce, my pretties!


Friday, September 4, 2015

Colourpop: the brand you aren't using yet!

I've been so caught up in spending every penny of my hard earned money on $20 lipsticks, that I'd never even considered the $5 ones.  Colourpop is dishing out some pretty unique products that won't break the bank.  I follow several MUAs on Instagram, and all of them rave about Colourpop.  I figured if it's good enough for Amrezy, it's good enough for me.

Colourpop offers a wide range of products:  eye shadows, blushes and highlighters, lip sticks with matching liners, and liquid lipsticks that dry matte.  I'm a sucker for liquid lipsticks and Colourpop just released their own line of Ultra Matte Lipsticks...so I was basically forced to try them.

But don't worry.  These Ultra Mattes are $6.  SIX.  SIX DOLLARS.  So they can't be good quality can they?  WRONG!  Granted, I just got these today in the mail and I've only tried one of them...but I'm impressed!  The color payoff is great and it applies smooth in one swipe, not streaky in the least.  My only complaint with these is I feel there is almost too much product on the applicator when I pull it out of the tube.  When I was swatching these, one of them literally dripped across my lap.  And when applying the lipstick, it was starting to drip down from the lid towards the sponge.  I'm not sure if this is normal or maybe they were warm from sitting outside in my mailbox all day...either way it's not a huge deal.  And here are swatches of the Ultra Mattes I picked up:


I also grabbed a Lippie Stix in "Brink." I haven't worn it yet, but I'm already in love! And for $5? Yeah ok. I will say, there's not as much product here as a standard lipstick, but it's a great way to try a new shade without going broke.  They come in a variety of finishes and most of the Lippie Stix have matching liners! How awesome?! Check out this swatch of "Brink"


I also picked up a Supershock Eyeshadow for $5 in "Girl Crush" and a Supershock Blush for $8 in "Bonus." Both are matte but are available in other finishes. These bad boys have a completely unique formula. They have an almost mousse-like texture. It's hard to explain until you get one for yourself. They really are magical. And the reasoning behind it is brilliant! This texture means zero fallout. I KNOW RIGHT?! It is recommended that you apply with your fingers to get maximum color payoff, but synthetic brushes will work just fine. Natural fibers will absorb too much of the product and won't blend like synthetic fibers will. I swatched with my fingers, but when I applied to my face I used brushes and felt it was just as pigmented. The shadow I swatched over primer, but the blush was one swipe over clean skin. It's made to build up, so if you need more color just keep adding until you get your desired look: 


Overall I'm super impressed with my Colourpop haul. Their website is super awesome too! They swatch everything on three different skin tones and compare shades to one another so you can get a better idea about which ones are right for you. Plus they give you a personalized, handwritten note with your order. LOVE. I will definitely be giving them more of my money. You should too!

Until next time, my pretties!