Thursday, April 14, 2016

Kylie Lip Kit

Love her or hate her, Kylie Jenner has taken the makeup world by storm.  And with a quickness.  She released her first Lip Kits back in November.  Those first three shades broke the internet and sold out in less than a minute.  That's crazy, right?  The first few restocks were weeks apart and until recently, her products have seemed impossible to get.


Now Kylie Cosmetics offers restocks almost weekly and products are still selling out quickly, but your odds are a little better.  There are now eight Lip Kit shades that retail for $29.  The Kits contain one matte lipstick and matching lip liner.  She also very recently introduced three gloss shades at $15 each.  And if that's not enough, her Instagram reveals three new metallic lipsticks that are simply gorgeous.


Even with a restock coming to us every week, the entire web site is cleared out within 30 minutes.  If you miss out, you could always snag one on eBay for double the cost.  Or, just be patient and try again next week.  It's not that hard!  I mean, I managed to get my hands on a Lip Kit AND a gloss!

Kylie announces restock dates on her app, but there is a subscription cost.  Which I am not interested in.  Luckily, the makeup community is full of people willing to share this information with us at no cost! Here are a few tips to help you snag one of these kits:

Get there early.  

You need to be ready.  If the launch is at 7pm, don't wait until 7pm to get on the website.  Try to be on there at least 10 minute early.  One launch actually happened a few minutes early and some shades were already sold out by the actual launch time.  The site will be "down" with a message saying the restock is coming.  Just keep refreshing the page.  The early bird gets the Lip Kit.

Know what you want.

Know what you want BEFORE you log on.  If you're torn between two shades and can only buy one, make a decision before you get there so you can add your selection to your cart right away.  You don't want to waste time going back and forth and miss out on something you really want!

Be prepared.

When I bought my Lip Kit, I had visited the site early in the day and created a VIP account.  When the restock happened, I was still logged in to my account so I didn't have to enter ALL of my info.  For the rest of it, I set up my browser to Auto-Fill my address and other information so when I checked out I didn't have to waste time typing everything in.  Just because the item is in your cart doesn't mean it's yours.  Yes, the time you spend typing your info in could be the difference between success and failure.

Be patient.

The site use this "in line" system.  So you add items to your cart and when you click "check out" you are redirected to a screen that lets you know you are currently in line to check out and when a spot is open you will be able to enter your payment info, etc.  This is where most people start freaking out.  My first time, I was in line for less than a minute and had my confirmation email two minutes after the release time.  When I bought my gloss, I was in line for about 5 minutes but I was still able to get what I wanted!  That's why it's important to know what you want so you can check out quicker.  Waiting in line doesn't mean the item is yours.  Some people lose items while waiting.  Kylie announced that a different system was being tested because many people don't like the in line situation.  Personally, I don't mind it and it probably keeps the site from crashing which gives people a better chance in the long run!

Don't give up!

Just because you didn't get one this time doesn't mean you won't get one next time!  The restocks are more and more frequent and more units of each shade are available so they aren't selling out as quickly.  Also, it's just makeup.  It's not the end of the world if you don't get one!


So...is it worth the hype?

I think so!  I really do love my Lip Kit.  I chose Candy K because I knew it would be something I could wear every day.  The shade is gorgeous!


The liner is smooth and applies perfectly.  It is slightly different than the lipstick to create definition.  It's great.

I'll admit, the lipstick formula felt watery to me.  I don't know if they're all like that, but my Candy K isn't as thick and creamy as some of the other brands I use.  But after applying it, I immediately decided a thinner formula might be better. 

Even a little watery, the lipstick is crazy pigmented.  It isn't streaky at all and applies flawlessly in one swipe.  And it feels more comfortable than some other formulas because it's thinner.  It did seem to take a bit longer to dry than some others, but this could be useful if you like to do an ombre lip.

I did not need to reapply and I found it didn't rub off with drinking through out the day (there was barely any of it on my coffee lid!).

It will dry your lips, so make sure to wear a balm underneath (as you should with all matte lipsticks).

But it smells like candy. So there's that. 


Overall, I am OBSESSED and I need the rest of the shades.  I can't wait to see what the gloss is like!

So the answer is YES...you need some Kylie Cosmetics in your life.


xo

Wednesday, February 3, 2016

REVIEW: Lunatick Cosmetics Lab

A couple of weeks ago, I splurged a little and got a few things from Lunatick.  Their contour palette had been calling my name since I saw it.  Some MUAs I follow had posted tutorials on SnapChat using the cool-toned contour shades.  When a coupon code came up, I had to get it.

I didn't just get the contour palette.  I also purchased the High Definition Pressed Powder.  This was the first product that caught my attention because look at that packaging!


I read a couple of reviews from other Instagram users so I kind of knew what to expect.  I know I already mentioned the packaging...but LOOK AT IT.  


This was definitely the main reason I added this little compact to my cart.  Unlike other HD powders, this one is pressed (as opposed to loose).  For this reason, it's not as fine as others on the market.  Even so, it still provides the kind of skin perfecting benefits you're looking for.  For me, it won't replace my loose HD powder, but it's awesome for touch ups.  That's not to say that you can't use it in place of loose powder.  It does reduce shine, but I find my skin isn't matte all day.  However, my skin is moderately oily so no powders give me an all day matte finish.  That being said, this is definitely a product I will rebuy.  I think it's a fair price compared to high-end loose HD powders.  And I would pay $20 just for that packaging all day.  The outside features a mirror so as long as you carry a brush or sponge with you, you can use it as needed to powder your nose on the go!


Another packaging win, I grabbed one of their Apocalipsticks.  I chose the shade "AK-47" because I wanted to make sure I'd get something I could wear every day.  Nudes always win with me.


This lipstick has good wear, about the same as any other matte lipstick.  It's not all day like a liquid to matte, but it stays well.  The lipstick is super pigmented; I get full color in just one swipe.  


The formula is creamy and comfortable.  They have no scent, but that's okay because the packaging is AMAZING!!!  The matte black plastic bullet is super awesome.  For $15, it's a great deal.

And now...let's talk about this contour palette.  This guy has awesome packaging, but unlike the HD powder and lipstick, I didn't buy this for the packaging.  I bought this specifically for what's inside.


This palette has twelve shades to offer.  The way I see it, you're given six for contouring (#4, #7, #10, #6, #9, #12) two for highlighting (#1, #3) and four blushes (#2, #5, #8, #11).  Of the six contour shades, three are purple and three are brown.  We have a white highlighting powder, and a yellow one.  The blushes are unique from each other and range from light pink to a rich beige pink. 


The whole concept of contouring is to create shadows to give your face more depth and definition.  If you're using warm shades to do this, you'll end up with a sun-kissed look rather than a defined one.  This is true no matter your skin tone.  So these cool violet hues are perfect.  But, you're also given some warmer shades.  I like to create the illusion of a smaller forehead and camouflage my double chin (no shame) with something a little warmer.  This helps brighten my complexion and add some color to my pale face. 


I can highlight and contour with all the shades in this palette.  Even the darker shades are user friendly.  I typically use all three purples and two of the browns.  I start with #4 (light cool) below my cheek bones and down the sides of my nose.  This creates a "base" contour so I don't go overboard when I go back in with the deeper shades.  I use #10 (dark cool) or #12 (dark brown) closest to my ears (at the "top" of my contour) and blend it towards the center of my face with #7 (medium cool).  I go over the #4 on my nose with #6 (light brown).  I also use #6 along the sides of my face, from my temples down to my jawline.  I like to use a light contour around my face so my cheek contour doesn't look it's coming from nowhere.  You want to create a seamless contoured look.  To create the illusion of a smaller forehead, I use #9 (brown) with a light hand and blend this downward towards my brows and into the #6 along my temples.  I also use #9 under my chin and along my jawline.  Again, I blend the hell out of it so I have a seamless look.  It's important to really blend your contour so you don't have any harsh lines.  You want it to be as subtle and natural looking as possible while still giving you the definition you want.  See why contouring is so difficult?

I use #1 (white) on the low center of my forehead (between and just above my brows) and down the bridge of my nose and on  the center of my chin to brighten the center of my face.  You can also use this (or any other highlighting powder) below your cheek contour to blend out any harshness.  Shade #3 (cream yellow) goes under my eyes to help correct dark circles.  I apply it in an upside down triangle so it looks more natural.  This yellow is light enough to also act as a highlighter, giving you the look of higher cheek bones.  I apply blush between the contour and highlight, starting from the outside and blending towards the center of my face.

So that's how I use the palette.  But what do I think?  I think this palette is awesome.  I am able to use every single shade in different combinations and still end up with the results I want.  The only downside:  I don't think this palette is a win for every skin tone.  I am mega pale (MAC NC15) so this is my holy grail contour kit.  For darker complexions, these shades may not show up so well.  The white and yellow highlight shades in this palette actually show up on my fair skin.  The Anastasia Beverly Hills powder contour kit has been my go-to but even the lightest shade (Vanilla) is a perfect match to my skin, meaning it doesn't work for me as a highlight.  ABH Banana is still a great yellow shade for under the eyes, but it doesn't brighten and highlight the way the Cream Yellow from Lunatick does.  I admit, Luatick's Cream Yellow is almost too light if applied too heavily, so I go over it with a little Banana from ABH.  Luckily, the Lunatick contour palette features super silky powders that blend like a dream.  They aren't crazy pigmented, which is a good thing. You don't want contour powders to be highly pigmented because you need a subtle application.  What's great is you have the option for build-able coverage.  Basically, I think this palette can replace my ABH powder contour kit.  The only reason I'll still hang on to my ABH kit is: Lunatick doesn't offer replacement pans at this time.  BUT...the pans are 100% removable (for use in a Z Palette, etc) so I'm hopeful that Lunatick will offer refill pans in the future!  You can build your own eyeshadow palette online, so maybe a DIY contour palette is on the books.

As much as I love this palette, I wouldn't recommend it for someone who is new to contouring.  The shades are beautiful, but if you don't know what you're doing, you could end up looking like you got in a fight.  Contouring with brown shades can leave your face looking dirty if you're not careful, likewise this palette can leave you looking bruised.  I'm not an expert by any means, but I would consider my makeup skills to be advanced.  Even I had to take care in getting used to this palette.  The first time I used it, I wasn't sure how to feel about it.  But after a solid week of daily use, I decided I can't live without it.

Overall, I really do think $74 is worth it.  This contour palette is unlike any other I've seen on the market.  It has twelve 4g pans, making each pan worth $6.16, compared to ABH at $6.67 when purchased in the kit (or $14 per pan when you buy refills).  And much less than  the Kat Von D contour kit at $7.67 per pan (two different pan sizes in this kit technically would render two price points, but for simple math's sake, this is what we're seeing!).  The shades are unique and the packaging is original and appealing.  If you've been thinking of splurging, think no more.  I got lucky and bought it after Lunatick posted a coupon code on their Instagram.  Maybe you'll get lucky and snag some savings yourself.

This brand has won me over entirely.  Their products are top quality and beautifully packaged.  Plus, they're vegan and cruelty free.  The only thing stopping you from placing your Lunatick order right now is YOU!


Go CRAZY my pretties!


Tuesday, January 26, 2016

Brushy Washy

It's a chore, yes. But it's required. Necessary. Trust me. You've got to keep those brushes (and sponges!) clean!


Brushes can be expensive. For me, they're an investment. I like to take good care of them so I can use them for a long time! 

Cleaning your makeup brushes regularly has many benefits. For one, your brushes will last much longer if you keep them clean. Dirty brushes are more prone to shedding because product buildup forces the fibers to move around unintnetionally. Over time, the fibers loosen from the brush itself and fall out. Shedding is something that can happen with clean brushes, but dirty ones are more likely to lose fibers. 

Clean brushes also perform better. Not only can product buildup cause shedding, it can also distort the shape and texture of your brush. The best example I have is a dirty eyeliner brush. I use a tiny pencil brush to apply my gel liner. If I don't clean this brush everyday, I notice my wings aren't as sharp and smooth. It's because the gel liner builds up between the fibers in my brush. Although it's gradual and barely noticeable, the product buildup is causing the fibers in my brush to spread apart. Now that super pointy pencil brush is a little wider, leading to a thicker line.  This is something that can happen with creams and powders too. Cleaning your brushes will up their performance!

Keeping those babies clean isn't just good for them, it's good for you, too! If nothing else, the brushes you use to apply face makeup (foundation, concealer, contour, etc.) should be cleaned every day! Even a freshly cleaned and prepped face will leave oil and bacteria on your brushes. No matter what. Applying today's makeup with yesterday's bacteria can lead to tomorrow's break outs. Cleaning your brushes also helps keep that same oil and bacteria out of your makeup! It's overall healthy for you and your entire vanity. 

I clean my brushes two ways: wet and dry. "Dry" cleaning is something I do every day. It doesn't take that long and the benefits outweigh the chore of cleaning. 

I use MAC's brush cleanser daily. I don't get my brushes wet for daily cleaning simply because it takes longer and they need a lot of time to dry. I use a clean wash cloth instead of tissue or paper towels. Disposable cloth can tear or leave behind microscopic fibers or dust. And that's a pain to remove from your brushes. I have designated "makeup rags" for cleaning. Eventually, they will get stained so don't use your grandmother's antique embroidered towelettes for this.  I simply pour out some cleanser onto the wash cloth and gently "wipe" the brush across the cloth. You'll see the makeup come off on the cloth. You can repeat if necessary but usually a couple of passes gets the brush clean! 


Then there's "wet" cleaning. This is something I do once a month. Since I clean my brushes daily, there is no need for me to deep clean them more frequently. Some people don't daily clean, but they'll deep clean on a weekly basis. That's too time consuming for me plus "dry" cleaning brushes helps keep my skin clear. Anyway, deep cleaning your brushes with water and a cleanser is something you should also be doing. 

I typically do this on a day off from work when I can take my time and do it right. Or, do it the day before a makeup free day. That way, your brushes have an entire day to dry!

I have two methods. The lazy method involves soaking the brushes in the MAC cleanser for an hour or so and then rinsing them. This method is fine but it uses a lot of cleanser AND doesn't get the brushes as clean because after a while they end up soaking in liquified makeup mixed with cleanser. The other method is time consuming, but well worth the result.


For this, I've been using two different cleansers lately. Beautyblender's solid cleanser isn't just awesome for your sponge, it's a wonderful cleanser for your brushes! Speaking of sponges, I clean my blending sponge daily just like my brushes. I do rinse it because it will dry in no time. But, I clean it with the solid cleanser every week or so. 

Anyway, I use the solid cleanser by running it under water while building up a lather with the brush. And then I rinse. I've also been using Ulta's brush cleanser. I got it thinking I could use it like the MAC cleanser because they're both pink, but it's not the same. The Ulta cleanser actually says to rinse your brushes after using. So I use it like a shampoo! 

I always run my brushes under lukewarm water and rinse until completely clear. Sometimes I have to lather, rinse, repeat...especially if it's a brush I use for liquid or cream products. 

To dry, I reshape my brushes while damp and lay them flat to dry on a clean towel. If you have a way to dry them upside down, that will dry them quicker and more effectively. Never set them upright to dry. The water will collect at the base and could damage your brush. Not to mention the bacteria that could harbor in there!


As far as which cleansers you use, that's entirely up to you. I'm partial to MAC's cleanser because it's cheaper per ounce than any other high-end brush cleaner out there (yes I did the math). And cheaper than the cleanser from Ulta and Sephora. It also counts for Back to MAC, a recycling program where you return 6 empty MAC products (wipes and brush cleanser included) and get a free lipstick. I also like this cleanser because it's gentle and fast drying, which makes it perfect for daily use. 

I've used Sephora's daily brush cleaner and it works just fine, but it ends up costing more than MAC. elf also makes a brush cleanser that's $3 but it has a scent I don't care for and it leaves a slight residue on the brushes. 

As for deep cleaning, Sephora makes a brush shampoo that's pretty great. I like using my beautyblender solid cleanser because I feel like it lasts longer. However, the Ulta cleanser I could live without. It cleans my brushes, but I have to use so much of it to get them clean. 

There's tons of recipes for DIY and natural cleansers out there that will probably do the trick and save you money. I'm just super lazy and would rather pay $15 for mine. 

There's tools available to help you clean brushes. Textured pads and gloves for scrubbing, even a "washing machine" that cleans several brushes at once. I haven't yet looked into these devices, but they sound like a worthwhile buy to keep your brushes heathy. 

Whatever you use, it's important for you to get in the habit of cleaning your brushes. At this point, it is just part of my routine. Your brushes will thank you!

Scrub-a-dub my pretties!

Friday, January 15, 2016

Roller Lash Review!

Benefit has no shortage of awesome products.  I've never hated anything I've tried from this brand.  That being said, none of it seems to absolutely blow me away either.  Granted, I haven't tried everything they have to offer, so this review may be lacking a little brand knowledge.


I wanted to love this mascara because I see artists using it in tutorials all the time and they seem to really like it.  For some reason, I've been using false lashes lately.  Roller Lash is everyone's holy grail to prep their natural lashes before applying falsies.  Even when you wear false lashes, it's important to use mascara on your natural lashes to create a more seamless effect. 

This mascara does exactly what it claims to do.  It is an extreme curl mascara.  That's why it's so useful for false lash wearers.  It really does totally eliminate the need for an eyelash curler.  Since it give your lashes such great lift, it helps blend your lashes with your falsies.  And since it offers crazy curling abilities, it will make your real lashes look longer.  Here's my lashes with one coat of Roller Lash:


I have naturally long lashes (hate me) so lengthening isn't important to me.  I'm more interested in volume, which is why I've been rocking falsies these days (plus they really do make your lashes look FLAWLESS).  So what I'm saying is:  I don't care if this mascara gives me length. 

When I first applied this mascara, I really did love it.  It opened my eyes up because it lifted my lashes.  It's great for your bottom lashes as well because it doesn't clump at all.  It helps separate and define your lashes.  Most of the time, I don't even need to comb my lashes after.

So this mascara does what it says it will do and it makes your lashes looks great.  Why don't I love it?

After a couple of hours, it gets really dry and starts to flake off.  Which is super annoying because even with the most gentle swipe, you're often left with black streaks on your face.  It's also difficult to remove.  I typically use makeup remover and cotton pads, but I really have to break out the coconut oil to 100% remove this mascara from my lashes.

Application is important, but so is wear and removal.  Luckily I bought the "try it" size at Ulta.  So I only spent $10 on the small tube. 

I don't hate it so much that I won't finish the tube, but I will probably not re-buy.  Despite the adorable packaging and great initial results, this mascara just falls short for me.  Sorry!

Bat those lashes, pretties!

Tuesday, January 5, 2016

This Might Be A Bit Dry

It seems I fell off the face of the earth for a while! The holiday season allows little free time for me, but now I have no excuses to spread my wealth of knowledge!

And since the new year decided to (finally) bring some cold weather to the mountains, I think it's only fitting that I talk about battling the cold weather beauty woes!

A lot of us struggle to keep moisturized in the cold, dry weather. Here's what I do to stay hydrated. 

Skin
Dry skin is usually at the top of everyone's list of winter beauty issues. I use a few different products to help avoid flaky, dry skin. 

I highly recommend starting in the shower. Use a moisturizing body cleanser to start things off right. I love using Dove body wash because it's super mild and has a light fragrance (unless you go for something a little more fruity in their line). It's also full of moisturizers and won't leave a weird residue on your skin. 

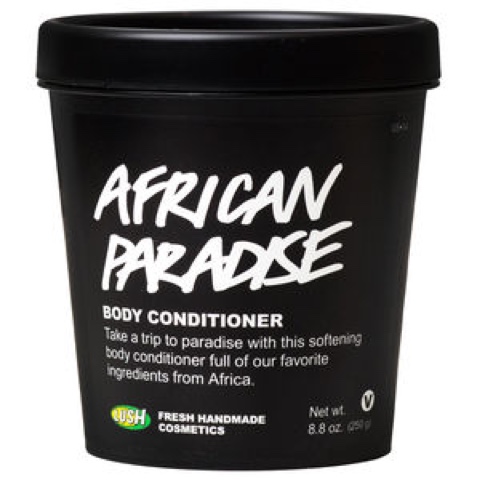
If that's not enough, condition your skin before leaving the shower. That's a thing? You bet! Lush makes a product called "Body Conditioner" which I also thought was weird until I received some as a gift. 


Believe me, this stuff is awesome. You use it after washing. Like you would hair conditioner. You simply rub it into wet skin and rinse. Pat dry when you get out and reveal super soft skin! 

Lush's body conditioners are not cheap. So if you want to try something else, I recommend using baby oil in the shower. This can get messy and leave your shower floor super slippery. Baby oil gel will create less mess but still give you the soft skin you desire. Use it the same way: rub into clean skin and rinse. Pat dry. 

Using this method keeps my skin soft throughout the day, but I'm usually feeling dry by the evening. Lotion is your friend. Try to stay away from heavily perfumed products as they can sometimes irritate sensitive skin. Once again, I turn to Lush. Their products don't have added perfumes or dyes. Any fragrance or color is the result of natural ingredients. Their Charity Pot lotion is a great place to start because it benefits select charities when you purchase it! 


It is also just a good standard lotion and the least expensive in their line. I also love Helping Hands hand lotion. Barely any fragrance at all and it absorbs quickly and doesn't feel greasy. So it's basically the perfect lotion for dry hands. If you don't want to splurge, my top drug store picks are Eucerin, Cetaphil, and Aveeno. These brands offer gentle care for sensitive skin but are also super effective. 

Don't forget your face! I moisturize my face daily as part of my beauty routine (and you should too), but if this isn't part of your regimen year round at least add it in during the cold months. Lush Imperialis is my go-to but any non-comedogenic lotions are good! Neutrogena is probably my favorite drug store skin care. 

Lips
Yes. Lips. Chapped lips are probably the most annoying thing to happen in winter. I wear lots of matte lipsticks, so I worry about keeping my lips moist every day. I always use a lip scrub. No surprise, mine comes from Lush. 


But there are plenty of alternatives out there and you can make one at home with ingredients you probably already have in your kitchen. I've made one using just coconut oil and sugar. Check Pinterest for recipes! Using a scrub removes dead skin and exfoliates to a smooth, soft surface. I always apply a lip balm after my scrub. I love eos balms. I have one in my bathroom, my nightstand, on the table near my spot on the couch, and of course there's one in my purse. Do I over balm? Yes. Am I sorry about it? No. 

I've also recently fallen back in love with a product I used in high school. Smith's Rosebud Salve is ahhhhhmazing! I used to use it for everything. 


The little jar it comes in was a little messy to use so I think that's why I quit using it. But recently, I was waiting in line at Ulta and there it was in the impulse fixture. In tube form!!! 


I was so excited that I gasped as I grabbed it and scared the woman behind me. So much easier to use for the lips! But even in a tube, you can still use to combat chapped skin anywhere on your body. 

Hair
Wait...your hair? YES!!! Hair is subject to lose moisture in the cold just like your skin. My hair care routine is a little specific (post coming soon all about my hair!) because I color it. BUT...dry hair in winter is something we can all fall victim to. I highly recommend using a lightweight oil or cream on hair before bed. I don't wash my hair every day, so I lose moisture on my ends (and my roots get oily). Every night, I spritz a little hydrating oil onto my hair. I do this when my hair is dry and I only apply to my ends. By the morning, my hair has absorbed the oil and I can style it like normal. I like OGX products. They're good quality, especially for the price! I'm using their Coconut Water spray right now. 
It's super lightweight but hydrates my hair enough so that it's still soft and shiny. 


Staying hydrated in winter can be rough. But it doesn't have to be! Adding a few extra steps to your daily routine will make all the difference. 

 
Keep it moisturizedmy pretties!


Thursday, November 19, 2015

Classic Lips

Where have I been?!  It seems like forever since my last post.  Sorry!  I've had a very busy schedule these last few weeks.

So I don't want to keep you waiting any longer.  Today I want to share with you the portion of my lipstick collection that I would call "classic."  To me, a classic lip is anything within the red family.  This includes pinks, corals, and oranges.  Classic colors like these are user friendly.  You just need to find the right tones to flatter your complexion.

Even red lipstick isn't just red lipstick.  Reds can have a variety of hues and undertones:  yellow, pink, blue, etc.  Which is why I have more than one red lipstick in my collection.  Sometimes I want a warmer red to set off golden eye shadow.  Or a cool red to stand out against a neutral eye look.  Whatever your need,  there is a red lipstick for every occasion. 

Classic lips are timeless.  They know no season.  Pink lips are just as pretty in spring time as they are in the dead of winter.  I think orange lips are perfect in the summer, but they are fitting to the colors of autumn as well.  And red...red goes with everything!

So here's some swatches to get us started.  These are what I would consider to be classic reds:


Riot and Nose For Style are definitely more muted reds.  Riot is described as "Marsala" which was Pantone's Color of the Year for 2015.  It's liquid to matte. Nose For Style is part of M.A.C's Haute Dogs collection and is limited edition.  It's a Mineralize Rich lipstick...so it has quite a bit of sheen and feels great on the lips.  Ruby Woo is probably my favorite red lipstick.  It's a matte lipstick, but it's much more comfortable than a liquid matte.  Mrs. Mia Wallace is from Urban Decay's Pulp Fiction collection.  This is a very comfortable lipstick, and it has a beautiful shine.  Redrum is a great red!  His formula is one of my favorites when it comes to liquid lipstick.  Hoe Hoe Hoe is part of the limited edition Holiday collection.  It's a bit darker and has purple sparkles! 

These shades are perfect for an every day look or an ultra glam look!


Here are some of my darker reds:


Tulle and Trust Issues have brown undertones.  On the lips, they look much redder.  Unicorn Blood and Wicked are both rich colors.  Unicorn Blood is a little brighter then Wicked, but both have a nice burgundy hue.  Dark Room is almost like a deep fuchsia.  It is compared to the color of beets, which I think is spot on.  Of all these colors, I find Tulle and Dark Room to be the most wearable.  I love deep reds like these for fall and winter.  However, I have been known to wear Dark Room on the hottest days of the summer!

Let's think pink, shall we?

I have been loving pink lipstick lately.  I find them extremely easy to wear!


Donut is just fun to wear!  It is a bit more coral, but it's more pink than orange.  Queen Supreme is a pastel neon.  This one works better with a liner underneath to darken the edges of your mouth a little.  Doll Parts is not only my favorite pink, but it might be favorite lipstick (at the moment any way).  And yes...that is quite a bold statement...but Doll Parts is seriously the perfect pink.  It's a little darker than most, not too "baby" and not too "hot."  It's just right.  Geradium is a close second (as far as pinks go).  It's warm and easy to wear.  Clueless is a limited edition shade based on the classic 90's chick flick.  It's a more nude pink.


Orange you glad it's time to talk about more lipstick colors?!


(714) is a pastel neon coral.  Against all these other oranges, it looks more pink than it really is.  I like this color, but of all my Jeffree Stars, it is my least favorite!  It looks much better with a liner underneath, but it is very pastel and against my fair skin it can wash me out a little.  Squash and Pumpkin couldn't be more fall if they tried.  I LOVE Squash so much.  Pumpkin is super wearable.  Gothica is a long-wear metallic.  I always forget about this guy.  Sparkly copper never fails.  Bang! Bang! is the perfect bright orange lipstick.  A Tennessee native, this color speaks to me on another level (Go Big Orange!).  It is definitely my favorite orange ever.

Obviously, I have a thing for classic lip colors.  They can seriously be worn by anyone.  Don't think that you can't pull off red lips...you can!  But if you're nervous to take the red plunge, ease your way in with a nice rosy pink.  Or try out a beautiful orange shade!  There is nothing stopping you from wearing your ideal classic lip color!

Pucker up, my pretties!

Friday, October 30, 2015

Halloween!

I probably should've posted this earlier in the week, but I'm always late to the party. Which is why these looks are great for anyone in a time crunch! It's no secret that I LOVE Halloween (who doesnt?) and at my place of employment, we are encouraged to dress up every weekend of October. Which is pretty cool. 

I also created these looks with things I already had. Both makeup and accessory wise. I have two big bins of full Halloween costumes and accessories. Another perk of my retail job. I realize not everyone has this advantage, but the looks I'll show require little in the way of extras. These are great for those of us with a tight Halloween budget! 

These looks are also work friendly. I worse normal (for me) clothing that complemented my makeup and accessories. 

For my first look, a simple bunny:


I threw on a black dress and cardigan I already had. A perfect start to a simple (lazy) costume. Also good for the workplace! I had the ears already, but they're easy to come by this time of year. And for less than $10. I did my makeup as usual, but drew on a little nose and whiskers. I used a black kohl liner to do this and set it with translucent powder to keep it from feathering or smudging. And on my lips I have "Bane" from Melt Cosmetics. Any black lipstick will do. Or black eyeliner to fill in the lips! Sometimes this lasts a little longer and works great in a pinch. Less than 5 minutes added to my normal routine. 

Next up, a fortune teller:


This look was even more basic than the bunny! I wore a regular black tank top I already had and threw on a fringe kimono. I already had the gold coin statement necklace, but I'm sure it wouldn't be hard to come by. Now, my turban is made by @roseandben. I have several of these bad boys and if I were ever to have a trademark, this would be it! This is a standard black bow turban with the bow removed. You could tie a scarf around your head for the same look! I went heavier than usual on my eye makeup. I used both the Lovesick and Dark Matter stacks from Melt. And I used the red shades on my cheeks for a flushed look. The moon was drawn on with MAC fluid line in "black track" and 210 brush. Very easy. Less than 5 minutes added to my normal routine. 

A really quick (comparatively) Day of the Dead/sugar skull look:


This took a little more than the previous, but it's nowhere near as detailed as some. I wore a black lace dress and the flowers in my hair I had already. I used white face powder all over yo start. I didn't have any white cream makeup and no time to buy any, but yes I had white face powder. I then used a gel liner pencil to draw large circles around my eyes. I used the same pencil to fill in the circles and draw the scallops around the edges. The same pencil was used in my nose and to draw the lines on either side of my mouth and the not so perfect spider web in my chin. Since I have bangs, I didn't draw anything on my forehead which was also a time saver. On my eyes and nose, I applied "dark matter" shadow from my Melt Dark Matter stack over the gel liner on my eyes and nose to set. I used my MAC 210 liner brush to apply the red dots around my eyes with Jeffree Star's liquid lipstick in "redrum." This is also the shade on my lips. And just a touch of "dark matter" as a sort of contour on my cheeks for a subtle hollowed appearance. For this look, I didn't do any of my normal routine. Altogether, it took me 30 minutes or less. 

I'll do one more look tomorrow, so it won't make it to this post. But here was my favorite:


A deer! I wore a plain brown sweater and jeans. Believe it or not, this was pretty easy to do. And only added about 10 minutes into my normal routine. I did my makeup like normal, but exaggerated my wings and added an open line on my lower lashes. I filled this in with my NYX jumbo eye pencil in "milk." For my eyeshadow, I used my Dark Matter stack shadows in "blurr" and "unseen." On my face, I applied "Havana" from my Anastasia Beverly Hills contour kit. I seriously never use this shade because it's a little too warm for me, but it was perfect for this look! I applied it heavily on my forehead and cheeks, all the way to my nose. And I used it along the sides of my nose as a contour as well. I used a black kohl liner to create my deer nose. My top lip is Melt "Bane" and the lower lip is Lime Crime "Shroom." I used the NYX jumbo eye pencil in "milk" for my spots and that's a wrap! I did buy the headband specifically for this look. There's lots of options out there. Easy felt ears can be made if you time and patience! 

These looks can be created with different makeup too. Don't go out and spend $50 on a palette if you don't think you'll use it regularly. Single shadows and bronzer scan be purchased at drugstores for a few bucks! If I didn't already have the palettes, that's where I would have headed. 

I can't wait to play around next year and make even better costumes!

Stay spooky, my pretties!